Migrating to ASP.NET Core Identity for Authentication


ASP.NET Core Identity
Since the release of ServiceStack v8 we have started to include the use of ASP.NET Core Identity for authentication in our templates. This gives developers the option to use the built-in ASP.NET Core Identity authentication system or ServiceStack's own authentication system when building their next system.
This provides a closer alignment with the ASP.NET Core ecosystem and allows developers to use the built-in ASP.NET Core Identity authentication system if they are already familiar with it.
If you are already using ServiceStack's authentication system, you can continue to do so, but if you are looking to migrate to ASP.NET Core Identity, this guide will walk you through the process with a concrete example of migrating our BlazorDiffusion example application.
Overview of the migration process
The migration process can be broken down into the following steps:
- Add NuGet dependencies
- Create ASP.NET Core Identity
AspNetUsersclass based on your existing customUserAuthclass - Create ASP.NET Core Identity
AspNetRoles, ensure matching primary key type toAspNetUsers - Create ASP.NET Core Identity
ApplicationDbContextclass, again matching primary key type toAspNetUsers - Create EntityFrameworkCore migration to initialize ASP.NET Core Identity tables
- Update
AuthFeatureregistration to use ASP.NET Core Identity - Update
Program.csto use ASP.NET Core Identity - Implement the Migrate Users Task
- Migrating Roles
- Migrate Foreign Keys from UserAuth to AspNetUsers
In this guide we will walk through each of these steps in detail and show how we migrated our BlazorDiffusion example application over to ASP.NET Core Identity to help you with your own migration.
Add ASP.NET Core Identity EntityFrameworkCore NuGet package
The first step is to add the required ASP.NET Core Identity NuGet packages to your project. This can be done using the dotnet CLI or via Visual Studio's NuGet package manager.
dotnet add package Microsoft.AspNetCore.Identity.EntityFrameworkCore dotnet add package Microsoft.EntityFrameworkCore.Tools
Since BlazorDiffusion was an existing Blazor project, we created a new blazor-wasm project using x new blazor-wasm BlazorDiffusion and migrated the Services and Components over to the new project.
We can do this because the blazor-wasm template and others have been updated to use ASP.NET Core Identity by default. So if your project previously used a ServiceStack template, first check if there is an updated version of the template available with ASP.NET Core Identity support.
Create ASP.NET Core Identity AspNetUsers class
Next you will need to create a class that inherits from IdentityUser to represent our users. This class will be used by ASP.NET Core Identity to store user information in the database.
You will want to mirror customizations from your own UserAuth class to this new class which will have the name in the database of AspNetUsers.
To minimize changes, you can rename your existing AppUser class to something like OldUserAuth and then create a new AppUser class that inherits from IdentityUser and copy over any customizations from OldUserAuth.
INFO
In this case AppUser is the name of our custom UserAuth class.
You will still need to reference your OldAppUser class for migrating users, so you will want to point it to the AppUser table by using the [Alias("AppUser")] attribute.
    [Alias("AppUser")]
    public class OldAppUser
    {
        [AutoIncrement]
        public int Id { get; set; }
        public string UserName { get; set; }
        public string DisplayName { get; set; }
        public string FirstName { get; set; }
        public string LastName { get; set; }
        public string? Handle { get; set; }
        public string Email { get; set; }
        public string PasswordHash { get; set; }
        public string? ProfileUrl { get; set; }
        public string? Avatar { get; set; } //overrides ProfileUrl
        public string? LastLoginIp { get; set; }
        public DateTime? LastLoginDate { get; set; }
        public string RefIdStr { get; set; }
        public DateTime? LockedDate { get; set; }
        public DateTime CreatedDate { get; set; }
        public DateTime ModifiedDate { get; set; }
    }
When creating your new AppUser class, you will want to copy over any customizations from your OldAppUser class. In this case we have added a Handle property to our OldAppUser class, so this will need to be included in the new AppUser class as well.
Essentially your custom EF IdentityUser will want a copy of all the properties you want to migrate other than Id, Email, and PasswordHash that's already defined in the base IdentityUser class.
// Add profile data for application users by adding properties to the AppUser class
[Alias("AspNetUsers")]
public class AppUser : IdentityUser<int>
{
    public string? FirstName { get; set; }
    public string? LastName { get; set; }
    public string? DisplayName { get; set; }
    public string? ProfileUrl { get; set; }
    [Input(Type = "file"), UploadTo("avatars")]
    public string? Avatar { get; set; } //overrides ProfileUrl
    public string? Handle { get; set; }
    public int? RefId { get; set; }
    public string RefIdStr { get; set; } = Guid.NewGuid().ToString();
    public bool IsArchived { get; set; }
    public DateTime? ArchivedDate { get; set; }
    public string? LastLoginIp { get; set; }
    public DateTime? LastLoginDate { get; set; }
    public DateTime CreatedDate { get; set; } = DateTime.UtcNow;
    public DateTime ModifiedDate { get; set; } = DateTime.UtcNow;
}
Create ASP.NET Core Identity AspNetRoles
Next you will need to create a class that inherits from IdentityRole to represent your user roles. This class will be used by ASP.NET Core Identity to store role information in the database.
[Alias("AspNetRoles")]
public class AppRole : IdentityRole<int>
{
    public AppRole() {}
    public AppRole(string roleName) : base(roleName) {}
}
Again, because our AppUser class is using a different primary key type than the default string type, you will need to specify a matching primary key type for your AppRole class.
Create ASP.NET Core Identity ApplicationDbContext class
Now to use our AppUser and AppRole classes, you will need to create a class that inherits from IdentityDbContext to represent our database context. Just like with any EntityFrameworkCore database context, this class will be used to query and save data to the database.
public class ApplicationDbContext(DbContextOptions<ApplicationDbContext> options)
    : IdentityDbContext<AppUser, AppRole, int>(options)
{
    protected override void OnModelCreating(ModelBuilder builder)
    {
        base.OnModelCreating(builder);
        builder.Entity<AppUser>()
            .HasIndex(x => x.Handle)
            .IsUnique();
    }
}
Above uses the Handle property on the AppUser class to create a unique index on the Handle column in the AspNetUsers table. You can add other custom restrictions to your schema here as well as needed.
Create EntityFrameworkCore migration to initialize ASP.NET Core Identity tables
Now that you have your AppUser and AppRole classes, and can access them via your newly created ApplicationDbContext class, you can create an EntityFrameworkCore migration to initialize the ASP.NET Core Identity tables.
dotnet ef migrations add CreateIdentitySchema
You should run this command from the AppHost project directory, which in our case is BlazorDiffusion. This will generate your new EntityFrameworkCore migration in the Migrations directory of your AppHost project, along side your ServiceStack migrations.
With your new migration created, you can now update your database schema to include the ASP.NET Core Identity tables.
dotnet ef database update
Using the dotnet EntityFramework CLI is great for local development, but for production deployments you will need to run the migrations on your server. You can do this using ServiceStack's AppTasks feature prior to the standard ServiceStack migrations.
public class ConfigureDbMigrations : IHostingStartup
{
    public void Configure(IWebHostBuilder builder) => builder
        .ConfigureAppHost(appHost => {
            var migrator = new Migrator(appHost.Resolve<IDbConnectionFactory>(), typeof(Migration1000).Assembly);
            AppTasks.Register("migrate", _ =>
            {
                var log = appHost.GetApplicationServices().GetRequiredService<ILogger<ConfigureDbMigrations>>();

                log.LogInformation("Running EF Migrations...");
                var scopeFactory = appHost.GetApplicationServices().GetRequiredService<IServiceScopeFactory>();
                using (var scope = scopeFactory.CreateScope())
                {
                    using var dbContext = scope.ServiceProvider.GetRequiredService<ApplicationDbContext>();
                    dbContext.Database.EnsureCreated();
                    dbContext.Database.Migrate();
                }
            });
In the above example we are ensuring the database is created which creates the required schema, and then running the migrations to update the schema to the latest version.
Update AuthFeature registration to use ASP.NET Core Identity
With your ASP.NET Core Identity tables created, you can now update your AuthFeature registration to use ASP.NET Core Identity.
public class ConfigureAuth : IHostingStartup
{
    public void Configure(IWebHostBuilder builder) => builder
        .ConfigureAppHost(appHost => {
            appHost.Plugins.Add(new AuthFeature(IdentityAuth.For<AppUser,int>(options => {
                options.EnableCredentialsAuth = true;
                options.SessionFactory = () => new CustomUserSession();
            })));
        });
}
In the above example we are using the IdentityAuth class to register ASP.NET Core Identity with ServiceStack. This class is a wrapper around the standard ASP.NET Core Identity registration process and allows you to configure ASP.NET Core Identity options.
ServiceStack uses a compatible Identity v2 password hashing format, which should let you migrate your users to Identity Auth without the need to reset their passwords.
Update Program.cs to use ASP.NET Core Identity
Now you will need to configure IdentityCore middleware in your Program.cs file.
services.AddAuthentication(options =>
    {
        options.DefaultScheme = IdentityConstants.ApplicationScheme;
        options.DefaultSignInScheme = IdentityConstants.ExternalScheme;
    })
    .AddIdentityCookies();
services.AddDataProtection()
    .PersistKeysToFileSystem(new DirectoryInfo("App_Data"));

// $ dotnet ef migrations add CreateIdentitySchema
// $ dotnet ef database update
var connectionString = config.GetConnectionString("DefaultConnection") ?? throw new InvalidOperationException("Connection string 'DefaultConnection' not found.");
services.AddDbContext<ApplicationDbContext>(options =>
    options.UseSqlite(connectionString, b => b.MigrationsAssembly(nameof(BlazorDiffusion))));
services.AddDatabaseDeveloperPageExceptionFilter();

services.AddIdentityCore<AppUser>(options => options.SignIn.RequireConfirmedAccount = true)
    .AddRoles<AppRole>()
    .AddEntityFrameworkStores<ApplicationDbContext>()
    .AddSignInManager()
    .AddDefaultTokenProviders();
Since BlazorDiffusion is a .NET 8 Blazor WASM application, we also needed some additional dependencies setup.
services.AddCascadingAuthenticationState();
services.AddScoped<IdentityUserAccessor>();
services.AddScoped<IdentityRedirectManager>();
services.AddScoped<AuthenticationStateProvider, PersistingRevalidatingAuthenticationStateProvider>();
If you are migrating to Identity from an existing Blazor application, our templates have tailwind-css styled login and register pages that you can use to get started.
For these, you will also need the additional IdentityEndpoints mapped.
// Add additional endpoints required by the Identity /Account Razor components.
app.MapAdditionalIdentityEndpoints();
Implement the Migrate Users Task
So far we have prepared the application to use ASP.NET Core Identity, but we still need to migrate our existing users to the new ASP.NET Core Identity tables.
This will require:
- Migrating users from the
AppUsertable to theAspNetUserstable - Migrating custom roles table to the
AspNetRolestable - Migrating foreign keys from the
UserAuthtable to theAspNetUserstable - Migrating foreign keys from the
UserAuthRoletable to theAspNetUserRolestable (if any)
To do this we will create a new AppTask that will migrate our users to the new ASP.NET Core Identity tables.
AppTasks.Register("migrate.users", _ => {
    var log = appHost.GetApplicationServices().GetRequiredService<ILogger<ConfigureDbMigrations>>();

    log.LogInformation("Running migrate.users...");
    var scopeFactory = appHost.GetApplicationServices().GetRequiredService<IServiceScopeFactory>();
    using var scope = scopeFactory.CreateScope();
    using var dbContext = scope.ServiceProvider.GetRequiredService<ApplicationDbContext>();
    using var db = scope.ServiceProvider.GetRequiredService<IDbConnectionFactory>().Open();
    var migrateUsers = db.Select(db.From<OldAppUser>().OrderBy(x => x.Id));

    log.LogInformation("Migrating {Count} Existing ServiceStack Users to Identity Auth Users...", migrateUsers.Count);
    MigrateExistingUsers(dbContext, scope.ServiceProvider, migrateUsers).Wait();
});
In the above example we are using the IDbConnectionFactory to open a connection to our database and select all of our existing users from the AppUser table.
The MigrationExistingUsers method will then migrate our existing users to the new ASP.NET Core Identity tables.
private async Task MigrateExistingUsers(ApplicationDbContext dbContext, IServiceProvider services,
    List<OldAppUser> migrateUsers, string tempPassword="p@55wOrd")
{
    var userManager = services.GetRequiredService<UserManager<AppUser>>();
    var now = DateTime.UtcNow;

    foreach (var user in migrateUsers)
    {
        var appUser = new AppUser
        {
            Id = user.Id,
            UserName = user.Email,
            Email = user.Email,
            DisplayName = user.DisplayName,
            FirstName = user.FirstName,
            LastName = user.LastName,
            Handle = user.Handle,
            ProfileUrl = user.ProfileUrl,
            Avatar = user.Avatar,
            RefIdStr = user.RefIdStr ?? Guid.NewGuid().ToString(),
            LockoutEnabled = true,
            LockoutEnd = user.LockedDate != null ? now.AddYears(10) : now,
            LastLoginDate = user.LastLoginDate,
            LastLoginIp = user.LastLoginIp,
            CreatedDate = user.CreatedDate,
            ModifiedDate = user.ModifiedDate,
            EmailConfirmed = true,
        };
        await userManager.CreateAsync(appUser, tempPassword);
        if (user.PasswordHash != null)
        {
            // Update raw PasswordHash (which uses older ASP.NET Identity v2 format), after users successfully signs in
            // the password will be re-hashed using the latest ASP.NET Identity v3 implementation
            dbContext.Users
                .Where(x => x.Id == user.Id)
                .ExecuteUpdate(setters => setters.SetProperty(x => x.PasswordHash, user.PasswordHash));
        }
    }
}
In the above example we are using the UserManager to create a new AppUser for each of our existing users and then updating the PasswordHash property from the OldAppUser table.
Migrating Roles
If you are using custom roles, you will also need to migrate these to the new ASP.NET Core Identity tables, and then assign them to your users based on their existing roles in your previous setup.
Your ServiceStack Authentication roles will be stored in the UserAuthRole table separately or in the Roles property of your UserAuth class. You will need to migrate these roles to the new ASP.NET Core Identity tables and then assign them to your users.
foreach (var roleName in allRoles)
{
    var roleExist = await roleManager.RoleExistsAsync(roleName);
    if (!roleExist)
    {
        //create the roles and seed them to the database
        assertResult(await roleManager.CreateAsync(new AppRole(roleName)));
    }
}
If your use of roles is static, you can create the list of all your roles from your applications code. If your use of roles is dynamic, you will need to query your database for all the roles that exist in your UserAuthRole table.
One difference between ServiceStack Authentication and ASP.NET Core Identity is the use of the Admin role. In ServiceStack Authentication, the Admin role is a special role that gives the user access to all protected resources. In ASP.NET Core Identity, the Admin role is just a regular role that can be assigned to users.
This means for users with the Admin role in your existing application, additional roles will need to be assigned to them in ASP.NET Core Identity to give them access to the same protected resources.
In BlazorDiffusion we used the Admin role as well as others, but to preserve the existing behavior, we assigned all roles to users with the Admin role.
foreach (var user in Users.All)
{
    var appUser = new AppUser
    {
        Id = user.Id,
        Email = user.Email,
        DisplayName = user.DisplayName,
        UserName = user.Email,
        Handle = user.Handle,
        Avatar = user.Avatar,
        EmailConfirmed = true,
    };
    if(appUser.Email == "admin@email.com")
        await EnsureUserAsync(appUser, "p@55wOrd", AppRoles.All);
    else
        await EnsureUserAsync(appUser, "p@55wOrd", user.Roles);
}
The EnsureUserAsync method will assign the roles to the user.
async Task EnsureUserAsync(AppUser user, string password, string[]? roles = null)
{
    var existingUser = await userManager.FindByEmailAsync(user.Email!);
    if (existingUser != null) return;

    await userManager!.CreateAsync(user, password);
    if (roles?.Length > 0)
    {
        var newUser = await userManager.FindByEmailAsync(user.Email!);
        assertResult(await userManager.AddToRolesAsync(user, roles));
    }
}
Migrate Foreign Keys from UserAuth to AspNetUsers
If you are using foreign keys in your existing application, you will need to migrate these to the new ASP.NET Core Identity tables.
For databases like PostgreSQL, you can use the ALTER TABLE command to add a foreign key constraint to the AspNetUsers table, and we will want to remove the foreign key constraint from the UserAuth or AppUser table.
In BlazorDiffusion for example, the Creative table was using a foreign key to the AppUser table, so we needed to replace this with a foreign key to the AspNetUsers table.
ALTER TABLE "Creative" DROP CONSTRAINT "FK_Creative_AppUser_UserId";
ALTER TABLE "Creative" ADD CONSTRAINT "FK_Creative_AspNetUsers_UserId" FOREIGN KEY ("UserId") REFERENCES "AspNetUsers" ("Id") ;
For databases like SQLite, you will need to create a new table with the foreign key constraint and then copy the data over from the old table.
We use SQLite for BlazorDiffusion since it makes it easy deploy the application, and SQLite is a great option for small applications that don't need to scale.
Since we have to migrate several tables, we can create a ReplaceForeignKeyConstraint method to handle this for us.
private void ReplaceForeignKeyConstraint<TModel>()
{
    var modelDef = typeof(TModel).GetModelMetadata();

    var createTable = SqliteDialect.Provider.ToCreateTableStatement(typeof(TModel));

    var sql = $@"PRAGMA foreign_keys = OFF;
ALTER TABLE {modelDef.ModelName} RENAME TO {modelDef.ModelName}_old;
{createTable}
INSERT INTO {modelDef.ModelName} SELECT * FROM {modelDef.ModelName}_old;
-- DROP TABLE {modelDef.ModelName}_old;
PRAGMA foreign_keys = ON;";
    Db.ExecuteSql(sql);
}
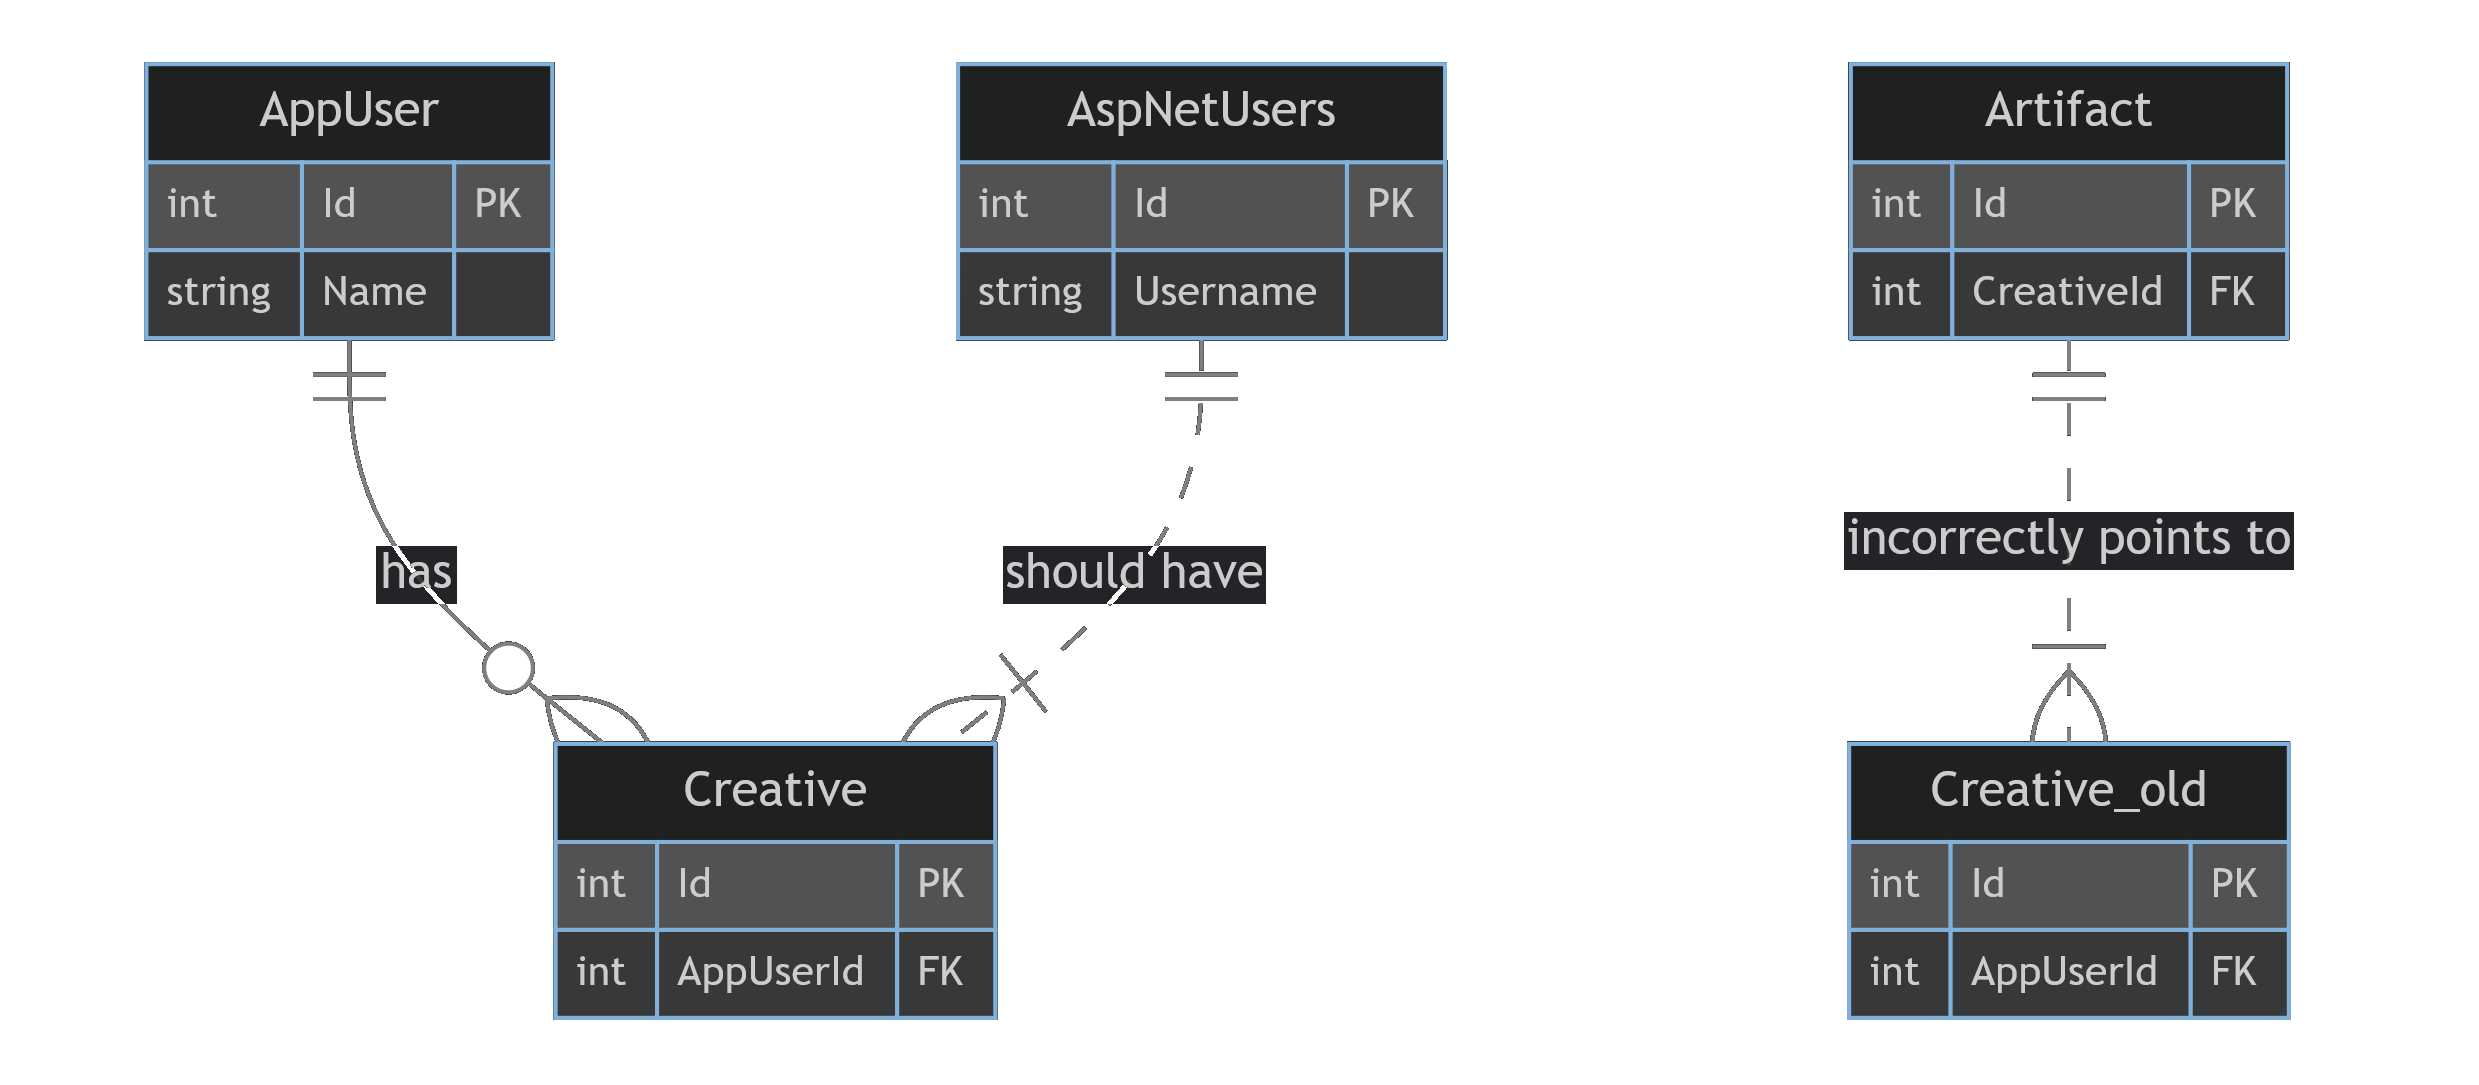
When replacing the tables like this, you will need to be aware of the order in which you replace the tables. For example, if you have a foreign key from the Creative table to the AppUser table, and a foreign key from the Artifact table to the Creative table, you will need to replace the Creative table first, and then the Artifact table.
This is because the Artifact table has a foreign key to the Creative table, and if you replace the Artifact table first, the foreign key will still be pointing to the old Creative table.
Incorrect migration order result
Correct migration order result
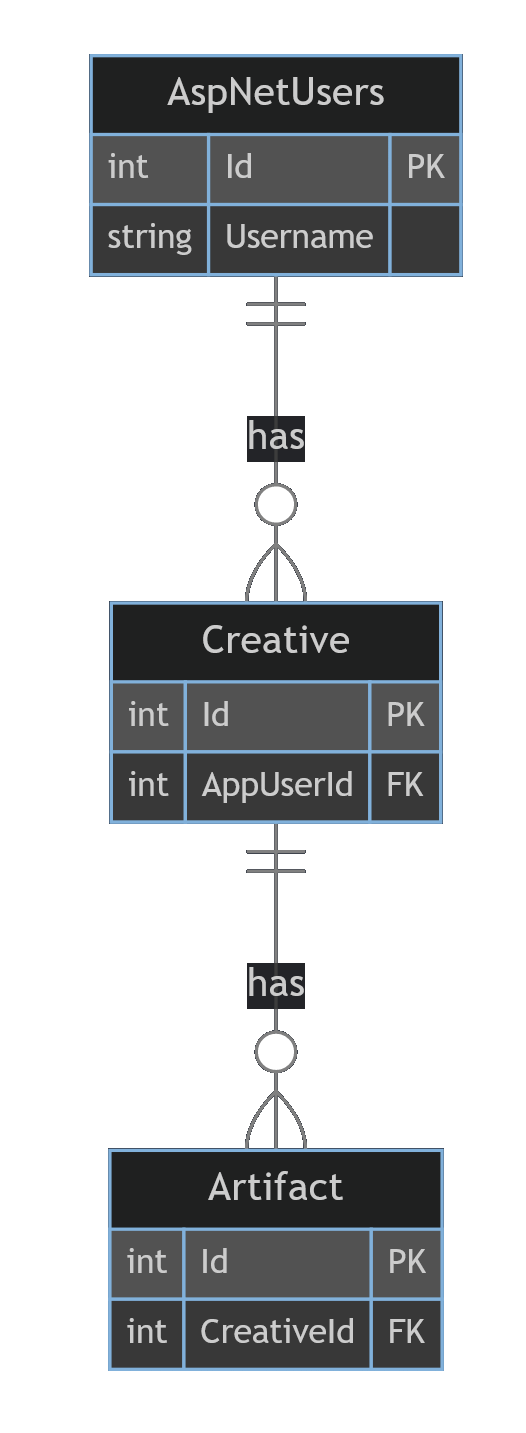
The rule of thumb is you will want to replace the tables from most depended on to least depended on.
Another limitation of the SQL above is that the order of the columns in the new table must match the order of the columns in the old table. INSERT INTO will insert the data into the new table based on the order of the columns in the new table, so if the order of the columns is different, the data will be inserted into the wrong columns.
During the migration of BlazorDiffusion, we hit this issue with the Artifact table. The Artifact C# class uses the AuditBase base class which has the CreatedDate and ModifiedDate properties. In a previous migration we added some additional columns as features were added. So when creating a copy of the Artifact class in the ServiceStack migration to handle fixing the foreign key, the order of the columns was different.
Thankfully, since internal classes used in migrations are completely separate for repeatable migrations, we can just create the Artfact class to be specific for this migration. So instead of inheriting from AuditBase, we can just copy the properties from AuditBase into the Artifact class in the order required.
Putting it all together, we have a migration Up method that looks like:
public override void Up()
{
    var appHost = HostContext.AppHost;
    var log = appHost.GetApplicationServices().GetRequiredService<ILogger<ConfigureDbMigrations>>();

    log.LogInformation("Migrating FKs from AppUser to AspNetUsers...");
    ReplaceForeignKeyConstraint<Creative>();
    ReplaceForeignKeyConstraint<Artifact>();
    ReplaceForeignKeyConstraint<Album>();

    ReplaceForeignKeyConstraint<ArtifactLike>();
    ReplaceForeignKeyConstraint<ArtifactComment>();
    ReplaceForeignKeyConstraint<ArtifactCommentReport>();

    ReplaceForeignKeyConstraint<AlbumArtifact>();
    ReplaceForeignKeyConstraint<AlbumLike>();

    ReplaceForeignKeyConstraint<CreativeModifier>();
    ReplaceForeignKeyConstraint<CreativeArtist>();

    ReplaceForeignKeyConstraint<ArtifactCommentVote>();

    ReplaceForeignKeyConstraint<ArtifactReport>();
}
In a separate migration, we can then drop the old tables after confirming the migration was successful, and the previous data has been migrated to the new tables.
public class Migration1007 : MigrationBase
{
    public override void Up()
    {
        DropOldTable<Migration1006.AlbumLike>();
        DropOldTable<Migration1006.AlbumArtifact>();
        DropOldTable<Migration1006.Album>();

        DropOldTable<Migration1006.ArtifactLike>();
        DropOldTable<Migration1006.ArtifactCommentReport>();
        DropOldTable<Migration1006.ArtifactCommentVote>();
        DropOldTable<Migration1006.ArtifactComment>();
        DropOldTable<Migration1006.ArtifactReport>();
        DropOldTable<Migration1006.Artifact>();

        DropOldTable<Migration1006.CreativeArtist>();
        DropOldTable<Migration1006.CreativeModifier>();
        DropOldTable<Migration1006.Creative>();
    }

    private void DropOldTable<TModel>()
    {
        var modelDef = typeof(TModel).GetModelMetadata();
        Db.ExecuteSql($@"PRAGMA foreign_keys = OFF;
DROP TABLE IF EXISTS {modelDef.ModelName}_old;
PRAGMA foreign_keys = ON;");
    }
}
Migrate Foreign Keys from UserAuthRole to AspNetUserRoles
If you have any tables that use a foreign key to your custom UserAuthRole table, you will need to do the same as above and migrate these to the new ASP.NET Core Identity tables.
Why Migrate to ASP.NET Core Identity?
ServiceStack's built-in authentication system is a great option for many applications. It provides a simple and easy to use authentication system that works out of the box with ServiceStack's built-in features like Sessions, Caching, and OrmLite.
However, as a part of making ServiceStack more compatible with the ASP.NET Core ecosystem, we have started to include the use of ASP.NET Core Identity since a lot of ASP.NET developers are already familiar with it.
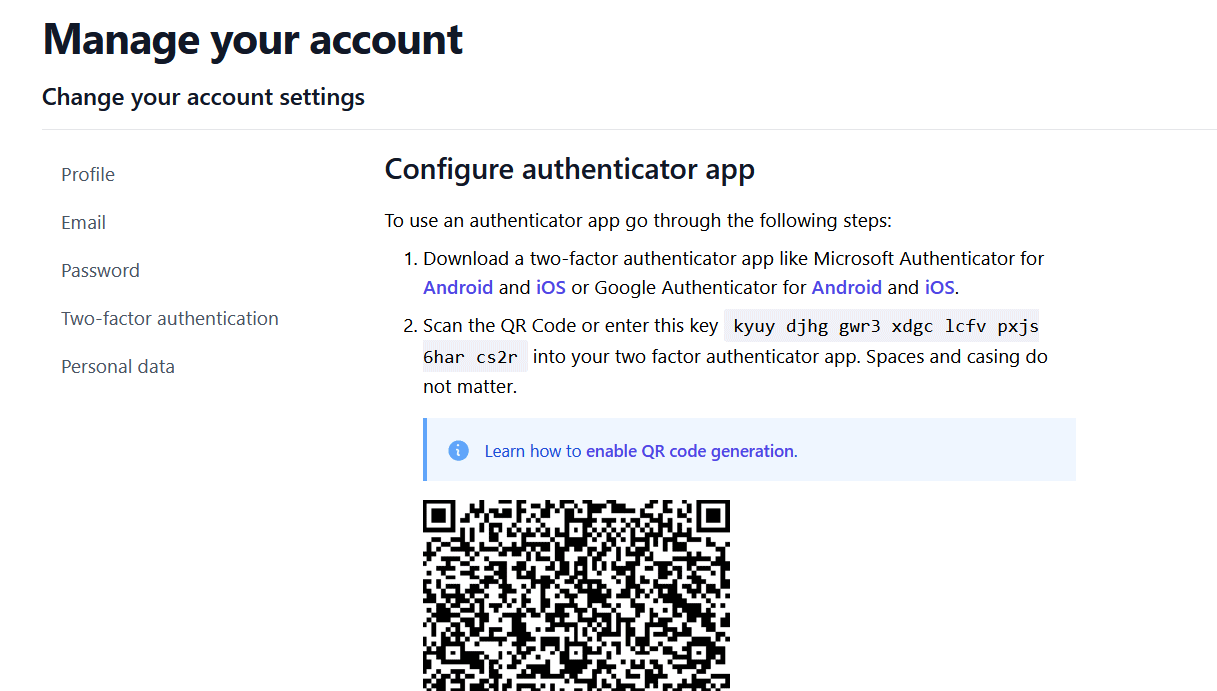
It also provides features like two-factor authentication, external authentication providers, and more that are not available in ServiceStack's built-in authentication system.
So while you don't have to migrate to ASP.NET Core Identity, it is a great option if you are already familiar with it, or if you are looking to use some of the additional features it provides.
If you are looking to migrate to ASP.NET Core Identity, we hope this guide helps you with your migration. If you have any questions, feel free to reach out on our forums.