New Blazor Interactive Auto Template with Custom Admin UIs


Since the release of .NET 8, we have been upgrading our templates and example applications to take advantage
of some of the new features, especially for Blazor.
Our templates now make use of static Server Side Rendering (SSR) for Blazor, which allows for faster initial page loads
and better SEO, and our blazor-wasm template uses InteractiveAuto by default to provide a more responsive UI.
What is InteractiveAuto?
Blazor for .NET 8 has four different rendering modes you can take advantage of:
- Static Server (static SSR)
- Interactive Server
- Interactive WebAssembly (WASM)
- Interactive Auto
For non-interactive pages, the static SSR mode is the fastest, as it renders the page on the server and sends the HTML to the client. However, when your page needs to be interactive, you need to use one of the interactive modes.
Prior to .NET 8, there was a trade-off between the two available render modes (static server rendering wasn't yet available).
The Interactive Server mode was faster to load, but the Interactive WASM mode was more responsive.
The initial load times for Interactive WASM could be quite slow, as the entire application and all its dependencies needed to be downloaded before the page could render most of the content.
The initial load time for the
Interactive WASMmode can be quite slow even for a minimal app
Our templates previously worked around this limitation with a custom Pre-Rendering solution, as the wait times were too long for a good user experience.
With .NET 8, the new Interactive Auto mode provides the best of both worlds as pre-rendering is now enabled by default.
When the page is first loaded, it uses the Interactive Server mode, which is faster than Interactive WASM as it doesn't need to download WASM resources.
So the user can start interacting with the page straight away, but with a slight delay for each of their interactions due to having to perform round-trips to the server for each interaction.
In the background, the WASM resources are downloaded which can then be used to render the site on the client for subsequent visits.
Using InteractiveAuto in your Blazor application
In Blazor for .NET 8, render modes can be set on both a per-page and per-component basis.
@page "/counter"
@rendermode InteractiveAuto

<Counter />
<Counter @rendermode="RenderMode.InteractiveAuto" />
ServiceStack.Blazor Components
The ServiceStack.Blazor Components have been updated for .NET 8 and work with the new InteractiveAuto render mode.
This means you can focus more on your application logic and less on the UI, as the components provide a high-productivity UI for common tasks such as CRUD operations.
AutoQueryGrid
The AutoQueryGrid component provides a full-featured data grid that can be used to display and edit data from an AutoQuery service. This is ideal for creating custom admin pages for your application. By integrating your admin screens into your application, you can optimize the user experience for specific workflows and get a huge amount of reuse of your existing AutoQuery services.
<AutoQueryGrid Model="Modifier" Apis="Apis.AutoQuery<QueryModifiers,CreateModifier,UpdateModifier,DeleteModifier>()" />
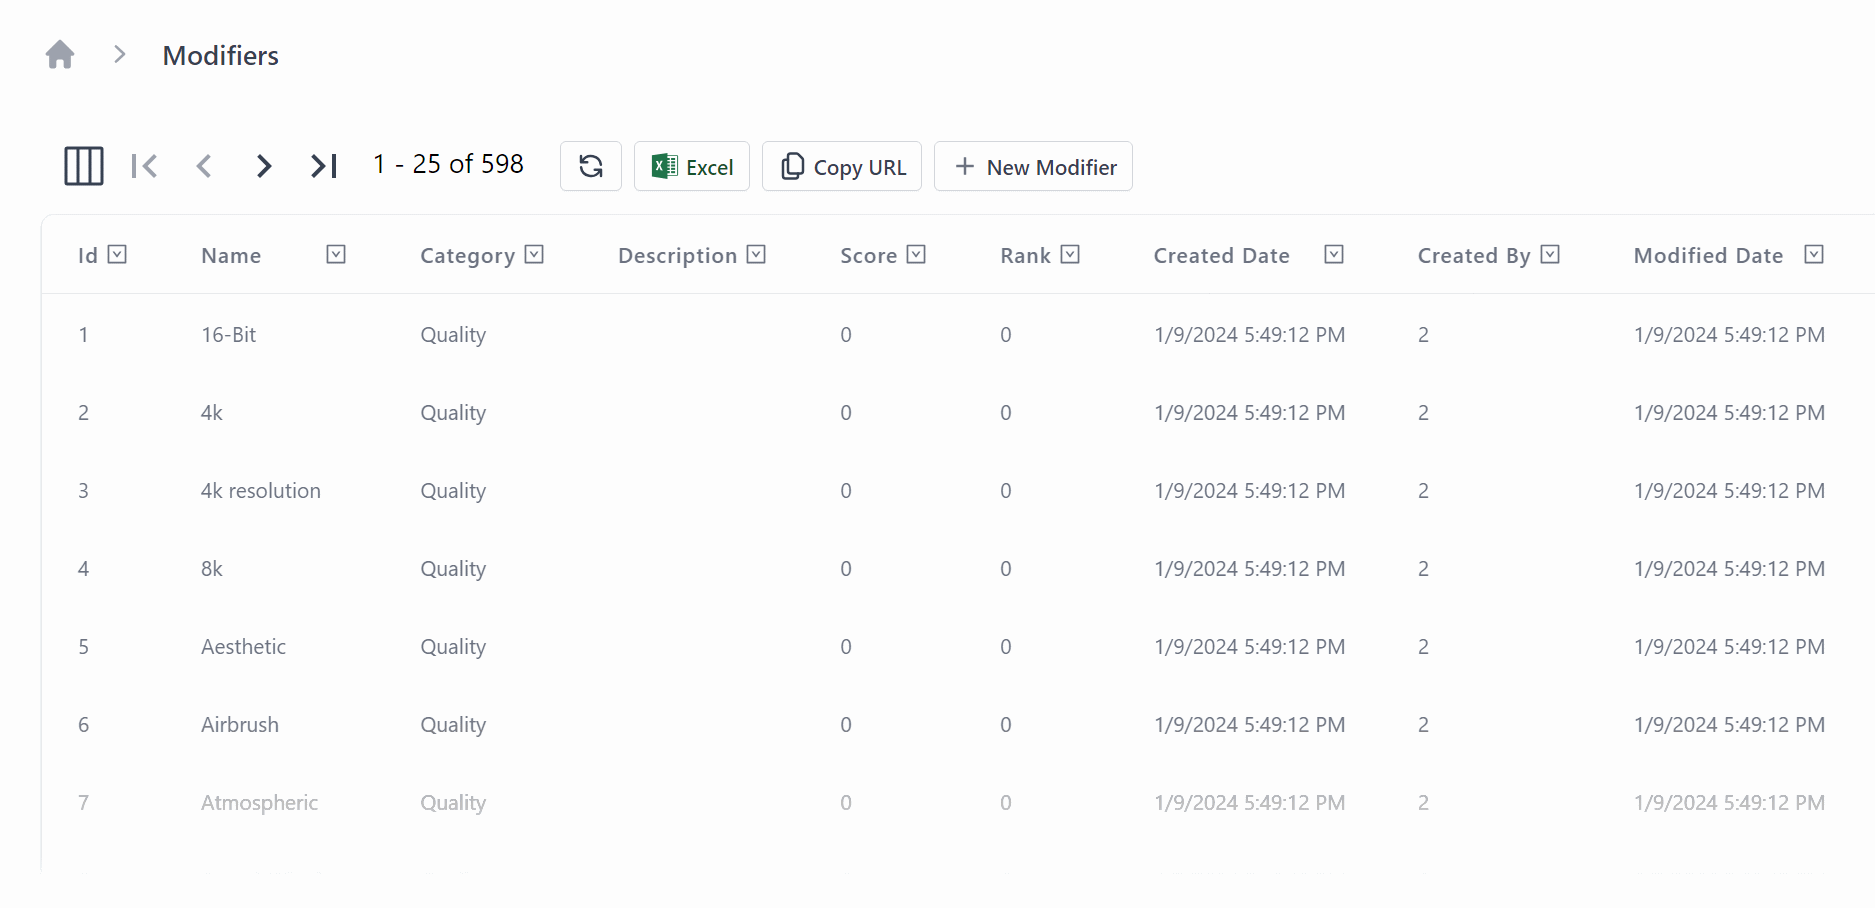
For BlazorDiffusion, our StableDiffusion example application, we used the AutoQueryGrid to create a custom admin page for managing the modifiers in the application.
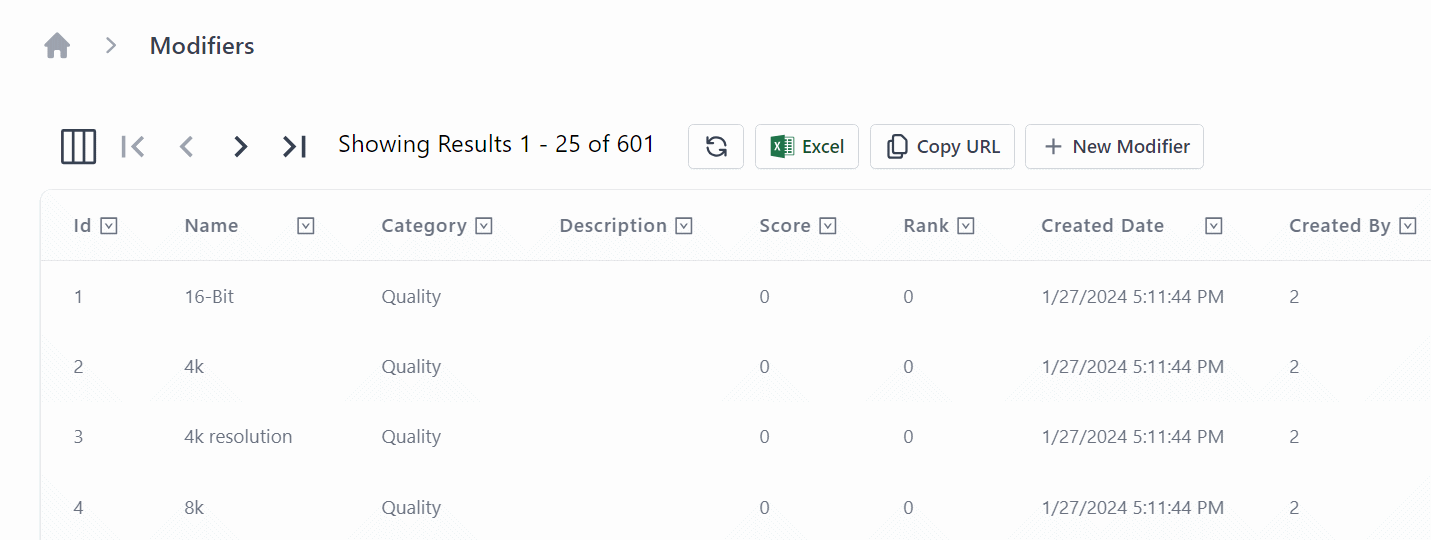
This is the simplest and fastest use of the AutoQueryGrid component, but it can also be heavily customized for lots of different use cases.
In BlazorDiffusion we customize the grid to enable easy navigation contextually between separate customized admin screens for each Creative, linking to related table data.
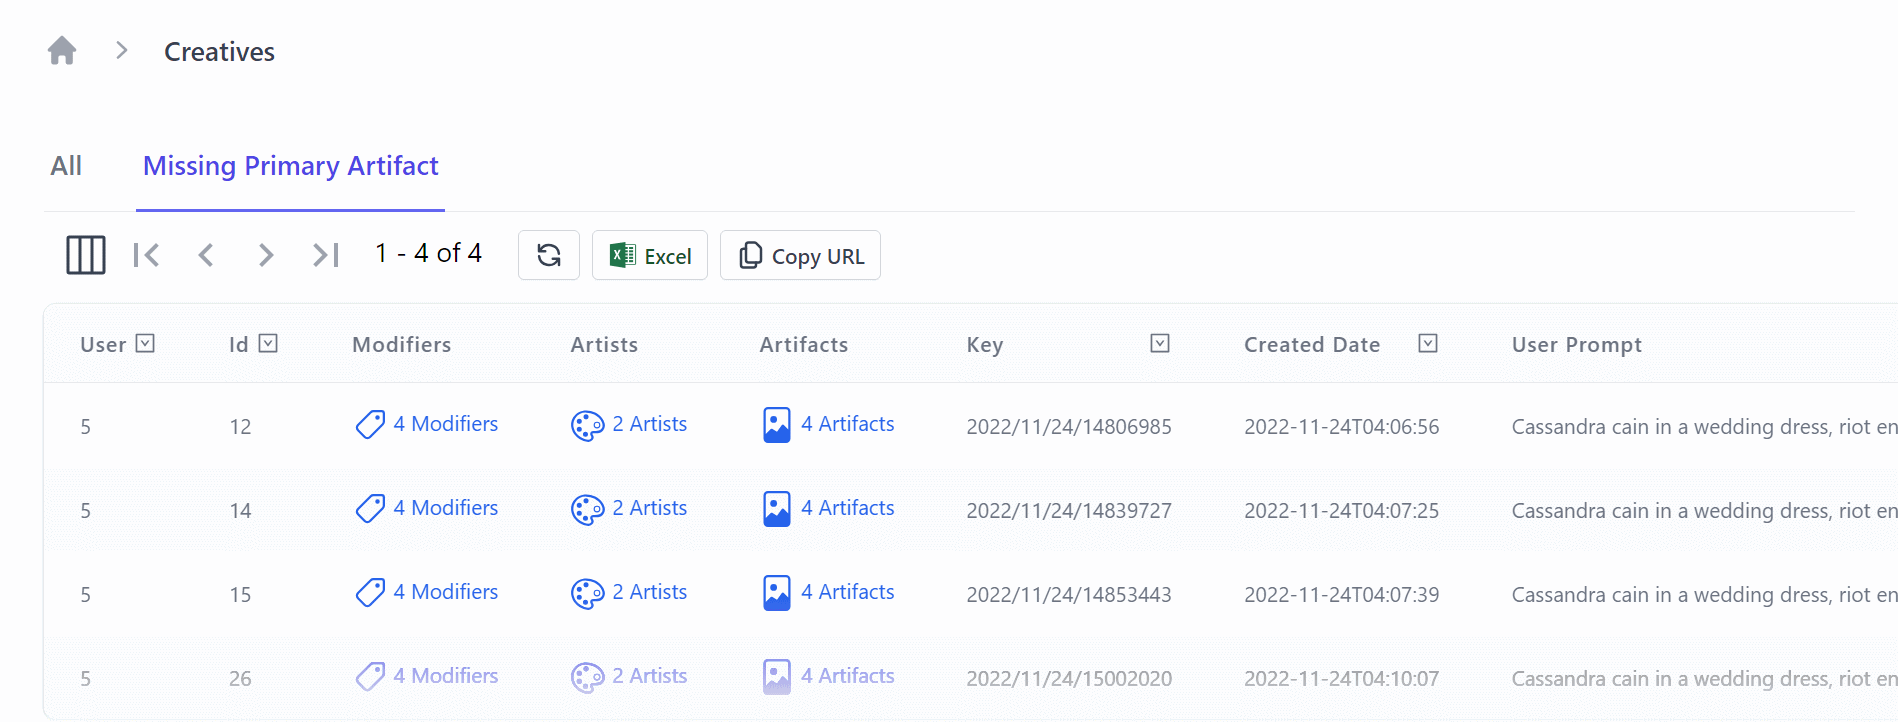
<AutoQueryGrid @ref=@grid Model="Creative" Apis="Apis.AutoQuery<QueryCreatives,UpdateCreative,HardDeleteCreative>()"
               ConfigureQuery="ConfigureQuery">
    <EditForm>
        <div class="relative z-10" aria-labelledby="slide-over-title" role="dialog" aria-modal="true">
            <div class="pointer-events-none fixed inset-y-0 right-0 flex max-w-full pl-10 sm:pl-16">
                <CreativeEdit Creative="context" OnClose="grid.OnEditDone" />
            </div>
        </div>
    </EditForm>
    <Columns>
        <Column Title="User" Field="(Creative x) => x.OwnerId" />
        <Column Title="Id" Field="(Creative x) => x.Id" />
        <Column Field="(Creative x) => x.Modifiers">
            <Template>
                @if (context.Modifiers?.Count > 0)
                {
                <TextLink class="flex" href=@($"/admin/modifiers?Ids={string.Join(",", context.Modifiers.Select(x => x.ModifierId))}")>
                    <Icon class="w-6 h-6 mr-1" Image=@typeof(Modifier).GetIcon() />
                    @TextUtils.Pluralize("Modifier", context.Modifiers)
                </TextLink>
                }
            </Template>
        </Column>
        <Column Field="(Creative x) => x.Artists">
            <Template>
                @if (context.Artists?.Count > 0)
                {
                <TextLink class="flex" href=@($"/admin/artists?Ids={string.Join(",", context.Artists.Select(x => x.ArtistId))}")>
                    <Icon class="w-6 h-6 mr-1" Image=@typeof(Artist).GetIcon() />
                    @TextUtils.Pluralize("Artist", context.Artists)
                </TextLink>
                }
            </Template>
        </Column>
        <Column Field="(Creative x) => x.Artifacts">
            <Template>
                @if (context.Artifacts?.Count > 0)
                {
                <TextLink class="flex" href=@($"/admin/artifacts?CreativeId={context.Id}")>
                    <Icon class="w-6 h-6 mr-1" Image=@typeof(Artifact).GetIcon() />
                    @TextUtils.Pluralize("Artifact", context.Artifacts)
                </TextLink>
                }
            </Template>
        </Column>
        <Column Field="(Creative x) => x.Key" />
        <Column Field="(Creative x) => x.CreatedDate" Format="s" />
        <Column Field="(Creative x) => x.UserPrompt" />
    </Columns>
</AutoQueryGrid>
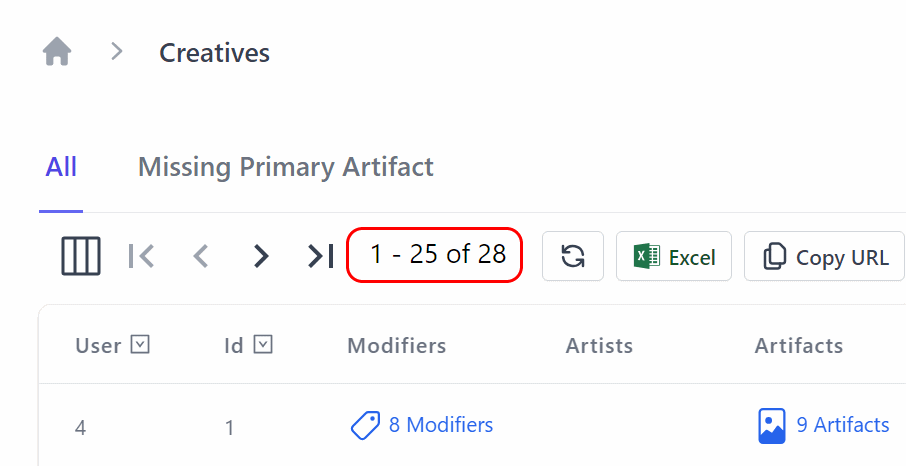
In the above example, we use the ConfigureQuery parameter to customize the query used by the AutoQueryGrid when displaying values.
This is ideal if you want to filter the data for specific workflows, for example, only showing the data that is relevant to the current user.
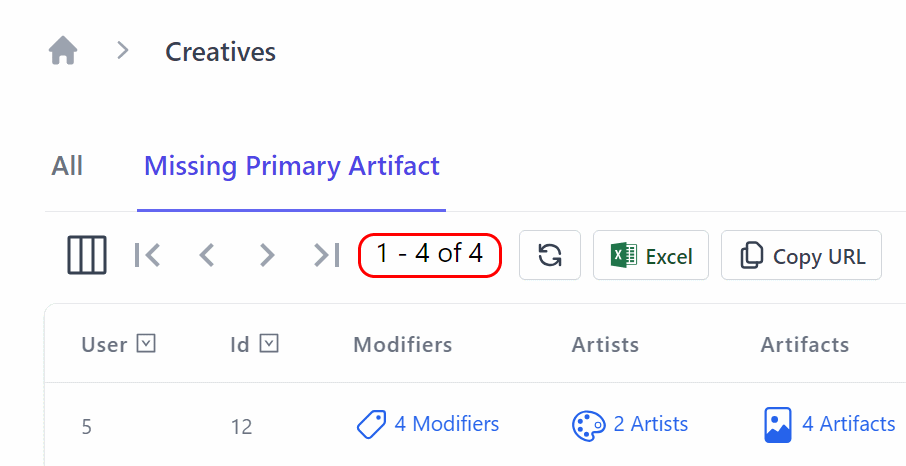
We combine this with a Tabs component to provide a navigation bar for the user to switch between the different filters on the same AutoQueryGrid.
<Tabs TabOptions="TabOptions" TabChanged="TabChangedAsync" />
We also use the EditForm parameter to customize the edit form for the AutoQueryGrid, so the workflow for editing a Creative is optimized using your own completely custom UI.
<AutoQueryGrid @ref=@grid Model="Creative" Apis="Apis.AutoQuery<QueryCreatives,UpdateCreative,HardDeleteCreative>()"
               ConfigureQuery="ConfigureQuery">
    <EditForm>
        <div class="relative z-10" aria-labelledby="slide-over-title" role="dialog" aria-modal="true">
            <div class="pointer-events-none fixed inset-y-0 right-0 flex max-w-full pl-10 sm:pl-16">
                <CreativeEdit Creative="context" OnClose="grid.OnEditDone" />
            </div>
        </div>
    </EditForm>
Upgrading to .NET 8
BlazorDiffusion was an example application we originally developed for .NET 6.
We upgraded the production release of this application to use our blazor-vue template, which can be perfect for public-facing web applications and teams that don't mind including a JavaScript framework in their application.
However, to show the flexibility of Blazor for .NET 8, we also upgraded the whole application from our updated blazor-wasm template to take advantage of the new InteractiveAuto mode.
Component Compatibility
Since the ServiceStack.Blazor library has been updated for .NET 8, we just needed to bring over the shared components from the original application and update the references to the new library.
When upgrading your application pages and components, you will need to avoid any JavaScript interop that runs during the InitializeAsync lifecycle method, as this is not supported in the InteractiveAuto mode.
Running on both Server vs Client
When using the InteractiveAuto mode, first visits will be running on the server, so your pages and components need to be available to both projects, as well as have any required dependencies registered in both projects Program.cs files.
By placing your shared pages and components in a shared project like the .Client project in the blazor-wasm template, you can easily share them between the two projects.
Look for any of your pages or components that use the @injects directive, as these will need to be registered in both projects.
INFO
Avoid sharing sensitive information via dependency injection, as this will be available to the client at runtime which will be able to be decompiled and inspected.
Source code and live demo
The source code for the upgraded BlazorDiffusionAuto application is
available on GitHub and you can view a live demo of the application at
auto.blazordiffusion.com.
Conclusion
The new InteractiveAuto mode in Blazor for .NET 8 provides the best of both worlds for Blazor applications.
A built in pre-rendering solution means that you can have a fast initial load time, but still have a responsive UI for subsequent visits.
And since the ServiceStack.Blazor components have been updated for .NET 8, you can take advantage of the high-productivity UI components to quickly create customizable and professional-looking admin pages in a Blazor application.
Feedback
If you have any questions or feedback, please feel free to reach out to us on our forums or GitHub Discussions.